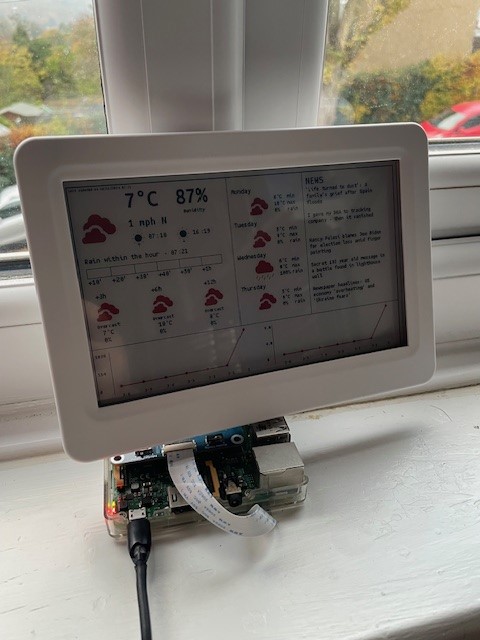
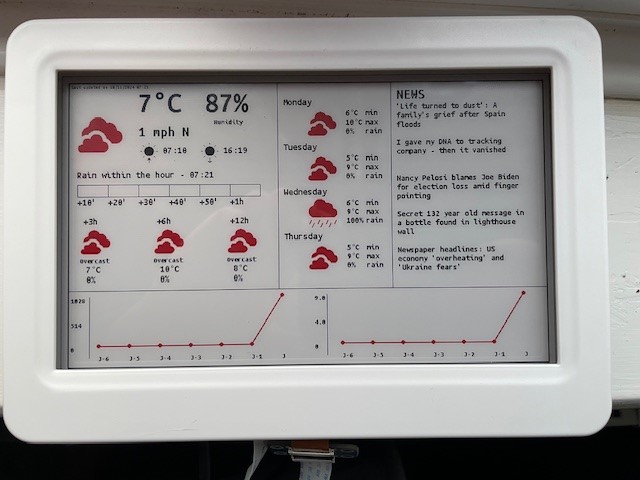
I saw a great project on Hackster.io about using a Raspberry Pi with an e-ink screen as a weather and news station. The Pi connects to the internet, retrieves the latest news and weather, and displays it on the e-ink screen.
I had a spare Raspberry Pi 3B+, so I thought this would be a nice little project to get some Python experience and add a unique display around the house. It turned out to be one of those projects that you might not have started if you knew a bit more beforehand! Anyway, I ordered the e-ink display from China and got to work. Initially, I thought this would be a standard display setup, where I'd just need to create a webpage or something similar to output to the screen, but that wasn't the case. These screens connect to the Pi via the SPI interface, and the Python script has to create an image using the Pillow library with all the data downloaded via API calls in JSON format, then render this data to the e-ink display.
I did some tests to see if I could get data from an API and send it to the display, and with the help of ChatGPT, got that working. But to have a nicely formatted screen with weather icons and other details took a bit more effort.
Most of the code was already written, but it was over two years old, so I had to update the drivers for the display and set up accounts to make API calls to OpenWeather and NewsAPI. Once that was sorted and with a bit more help from ChatGPT, everything started working.
There are a couple of issues I'm still trying to work out (like adding historic temperature and pressure data displayed in graphs, severe weather alerts, and pollution data), but it's pretty much up and running. I just need a nice frame, and I think I'll switch the Pi to a Zero to save space and maybe get an external power supply to avoid visible cables.
The code is available on my GitLab page, and I'll also leave a link to the original post on Hackster.
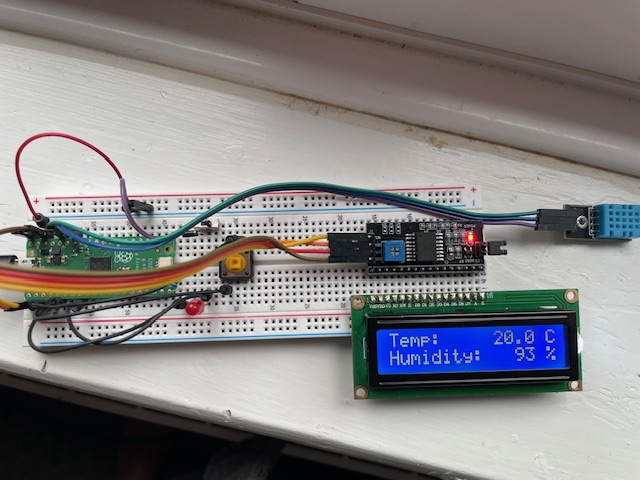
View the full working code for the Weather and News Station on GitLabAnother interesting project I saw was using a DHT11 temperature and humidity sensor with a Pi Pico. I already had the DHT11 sensor and a 16x2 LCD screen, which came bundled in an electronics kit I bought a while back, so I thought I'd give this one a go.
Picos are really cheap (£5 as of writing this), and it was another chance to get some Python experience (specifically MicroPython), so armed with my breadboard and a bunch of jumper wires, I got to work. The initial plan was to wire the LCD display directly to the Pico, but this needs approximately 16 jumper leads (a little overkill if you ask me). After some research, I found that you can buy an SPI interface for these screens, which cuts it down to just four leads.
The SPI interface needed to be soldered to the back of the LCD display, so I made a quick trip to B&Q to get a soldering iron, solder, and a mat to avoid burning the house down. This was the first time I'd soldered anything since school, but it was fairly straightforward, and a quick test with the multimeter showed all the joins were good.
Next was the coding. Again, I'm standing on the shoulders of other skilled hobbyists and utilizing their code, but I had to make some adjustments, as a few things weren't quite the same.
One feature I wanted to add was the ability to switch between Celsius and Fahrenheit on the display. I had a spare micro switch from the electronics kit, so I wired that up and added some extra code to enable this. It's not perfect since the code runs in a loop, you need to press the switch for a few seconds for the program to exit the loop and register the button press. The next plan is to update the code with an interrupt to eliminate this delay.
Another thing I want to add is its own power supply. I have three AA batteries in an enclosure and have wired them up, but I haven't managed to get it working yet.
I bought a Synology NAS about a year ago that can run Docker. I upgraded the RAM to 18GB and now have several Docker images runing, doing home-lab type stuff.
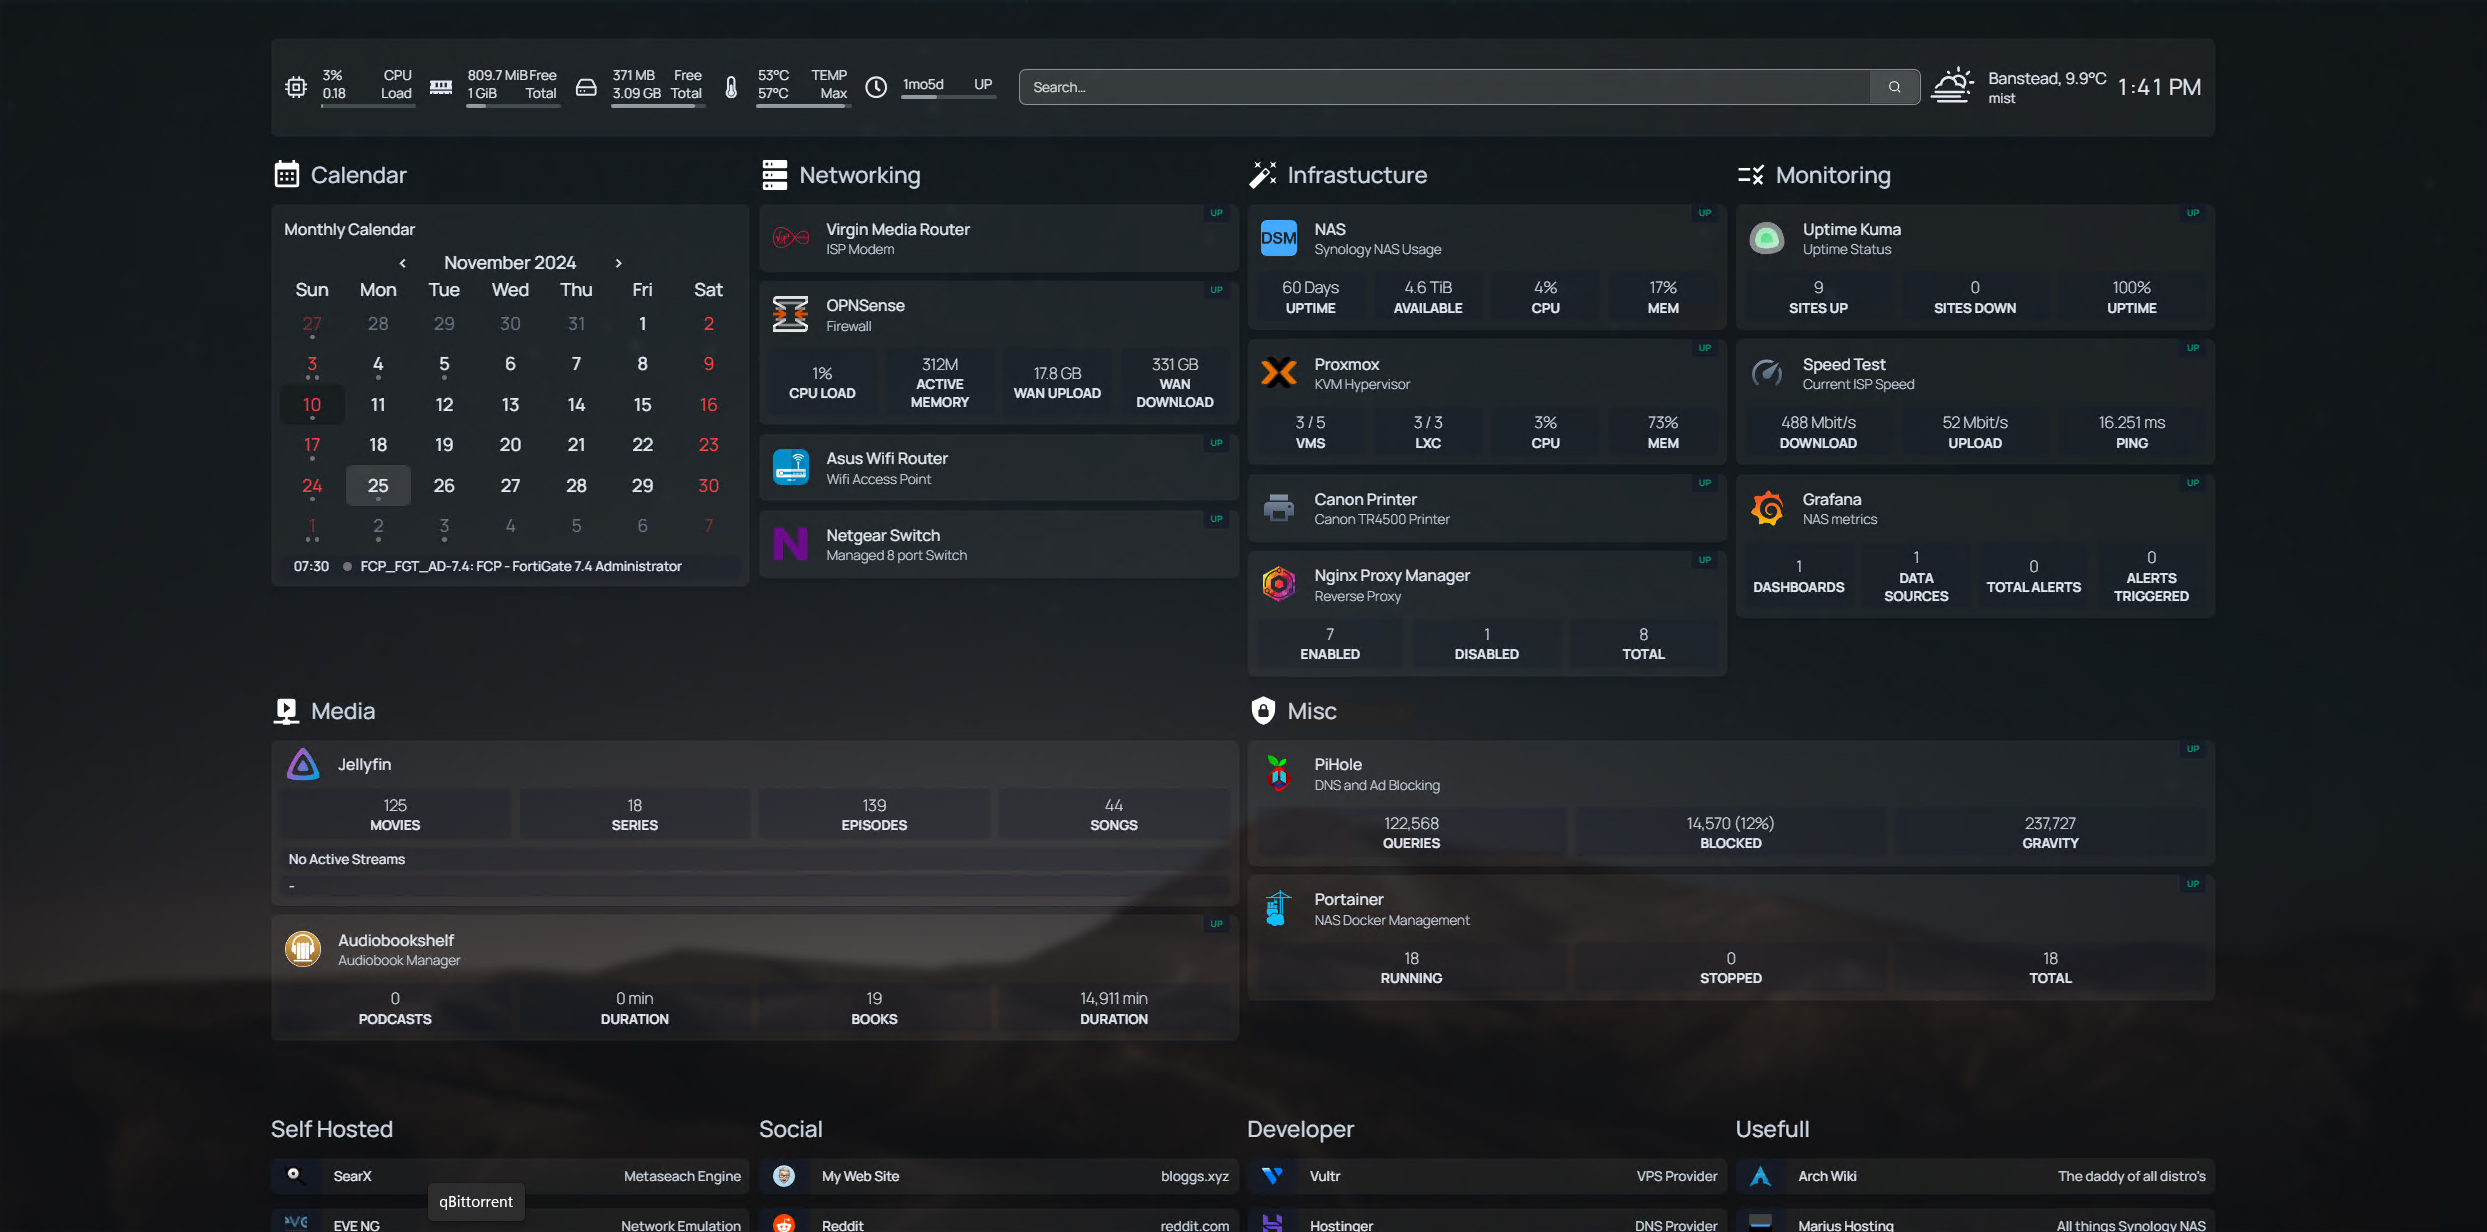
I found this nice Dashboard that will run as a Docker container called Homepage. It can link into any APIs and grab some usefull info to display at a glance. It will also get Google Calendar and Openweather API details.
Homepage uses YAML for configuration, YAML stands for "YAML Ain't Markup Language.". Which is a "human-readable data serialization format that's a superset of JSON". Great for config files, easy to read and write. Supports complex data types like lists and objects. But as with Python, indentation really matters. As I had already used Docker Compose I was a little familier with YAML and this set up was quiet easy.
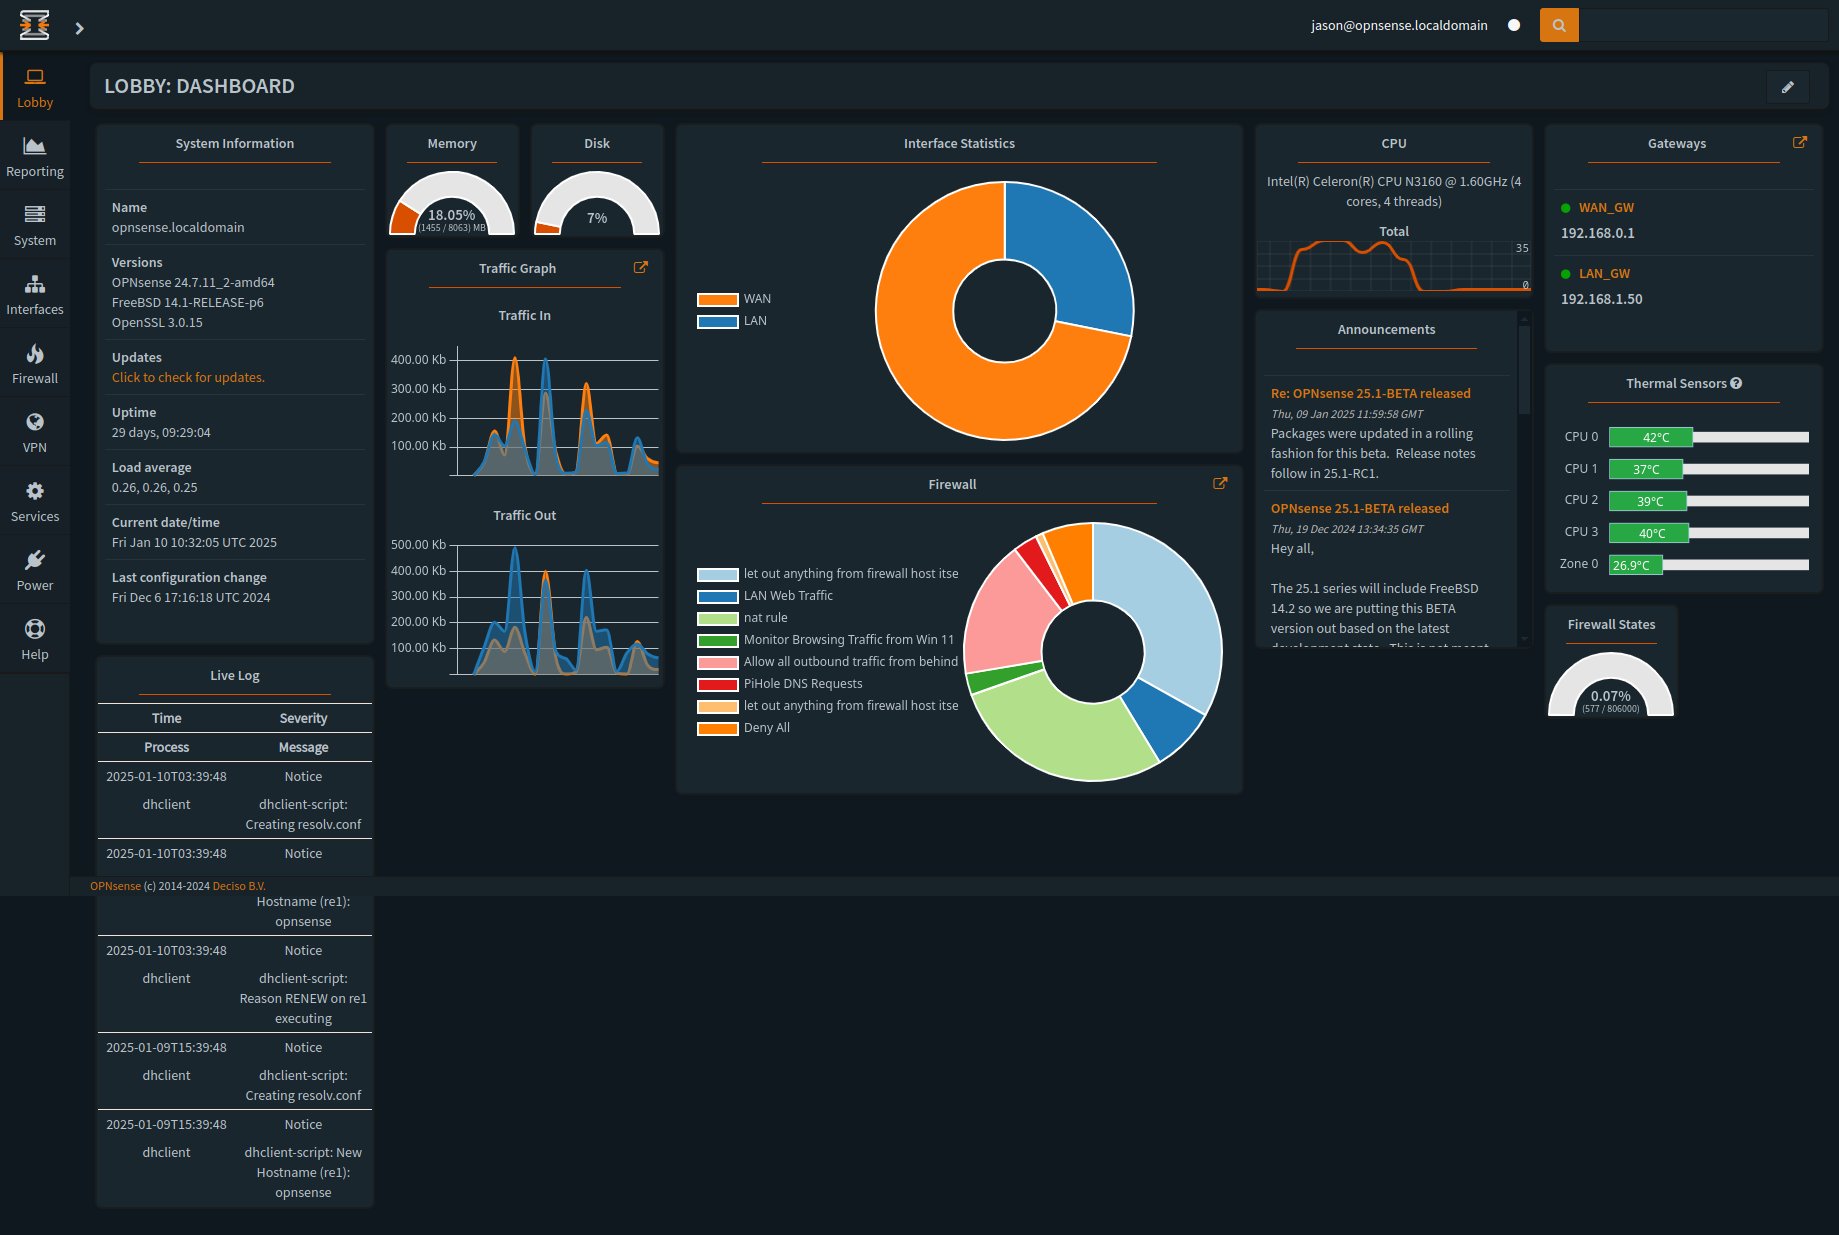
This app links into and reads API data from my OPNSense firewall, PiHole and pretty much most of my Docker images I have running and is now my goto site and home page when I open the browser.
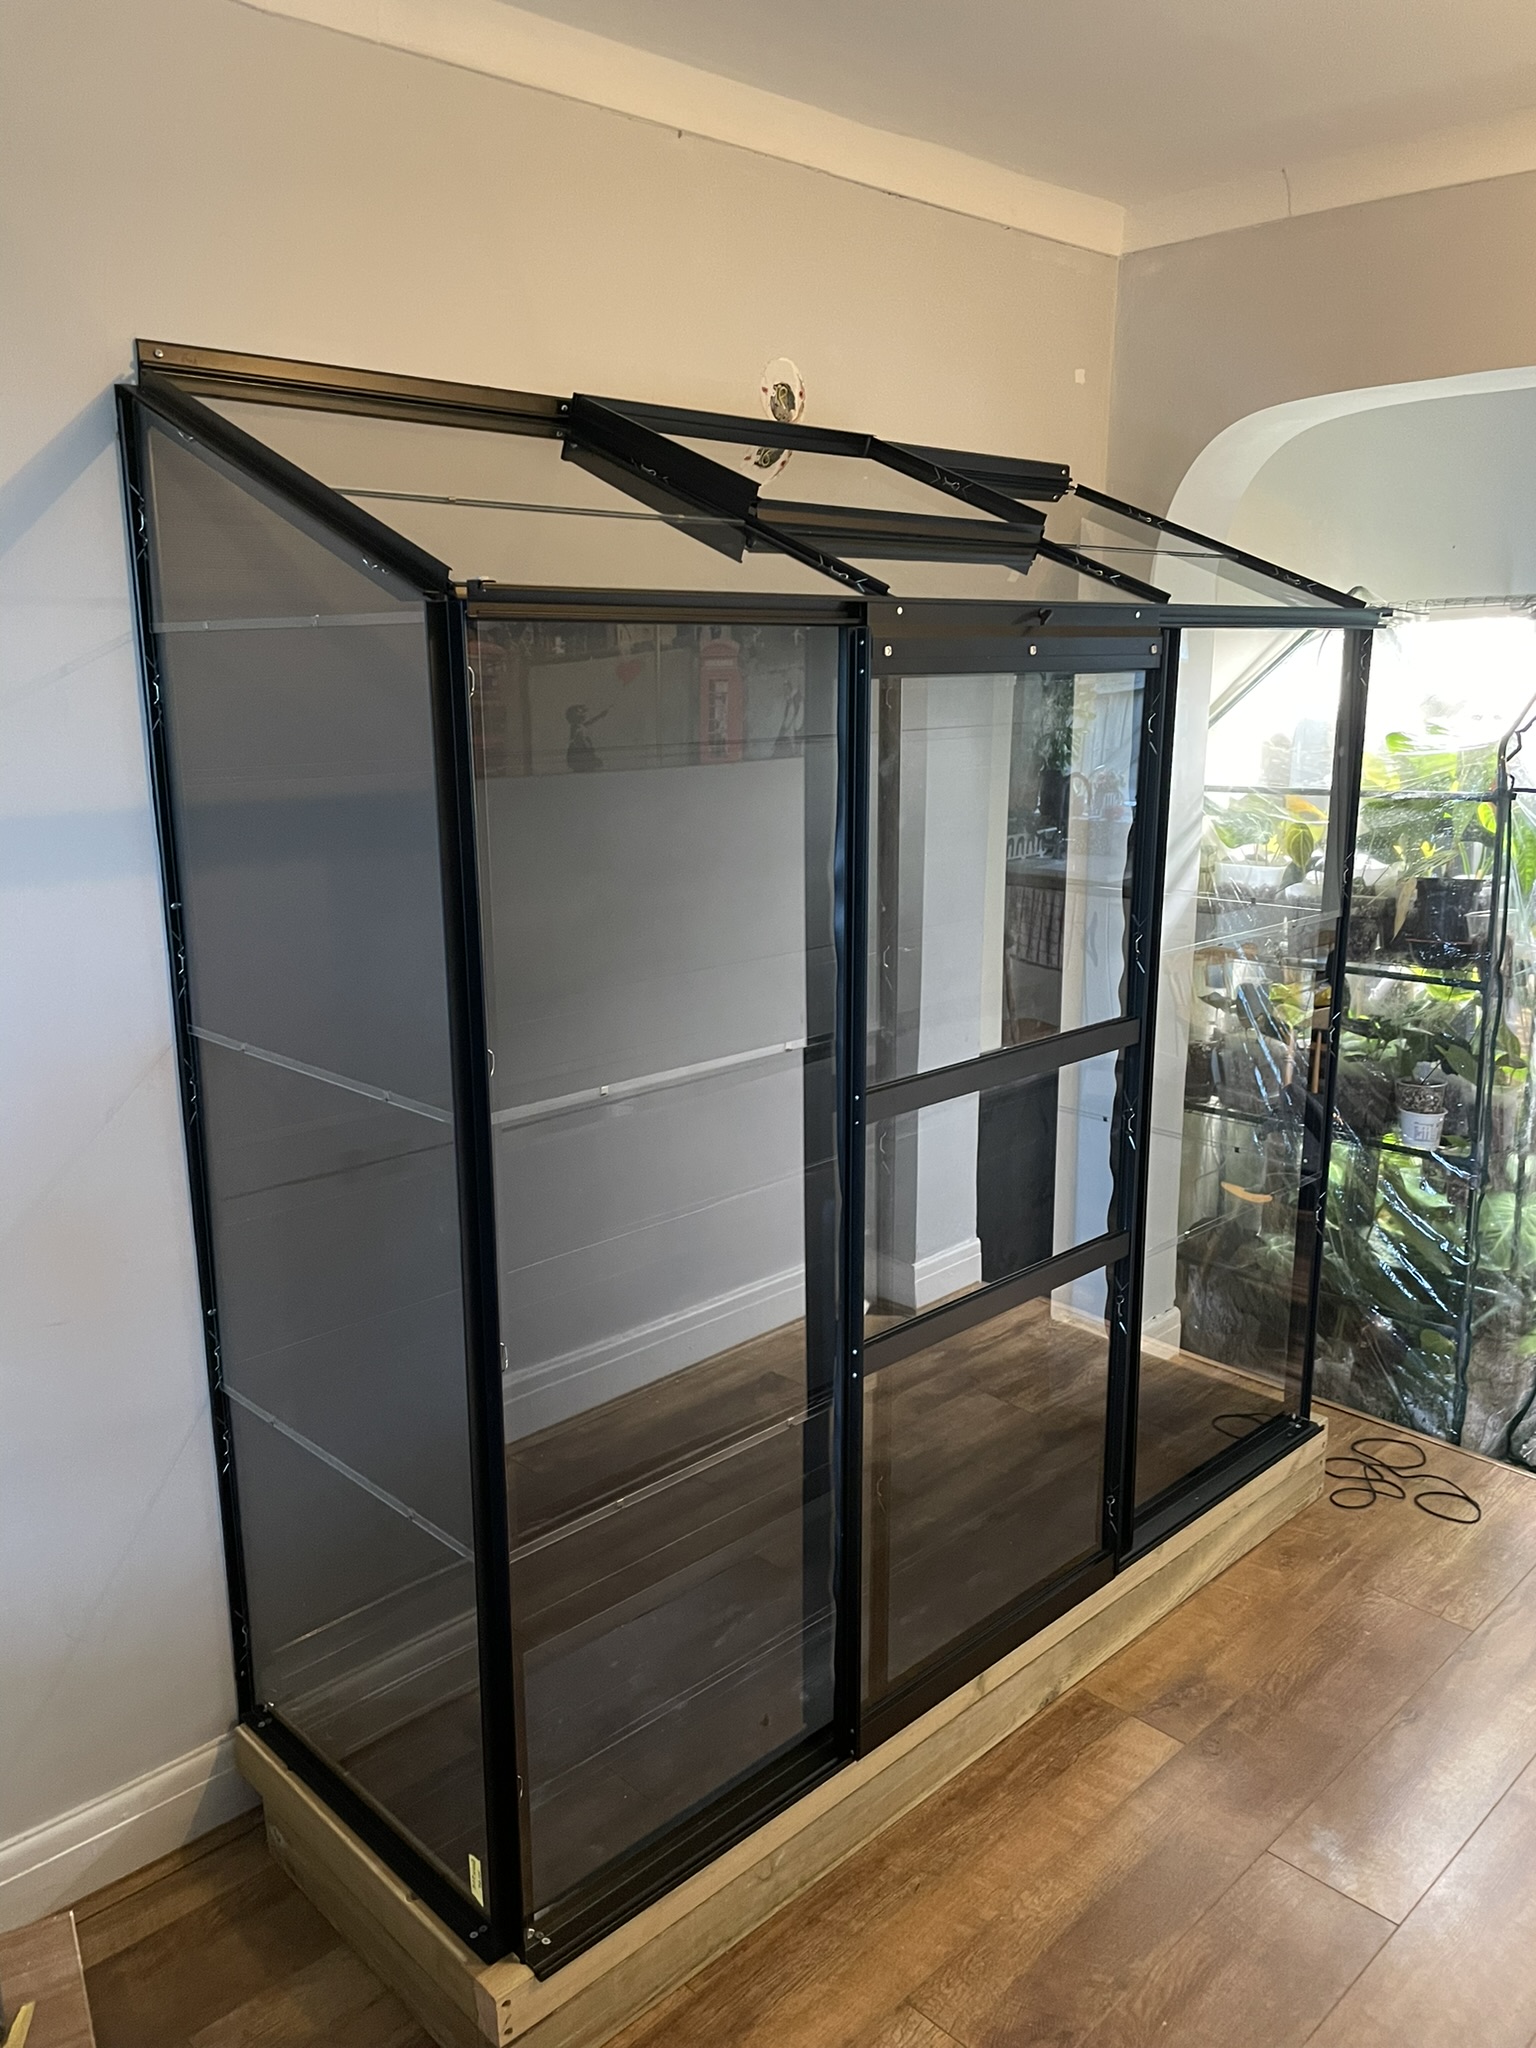
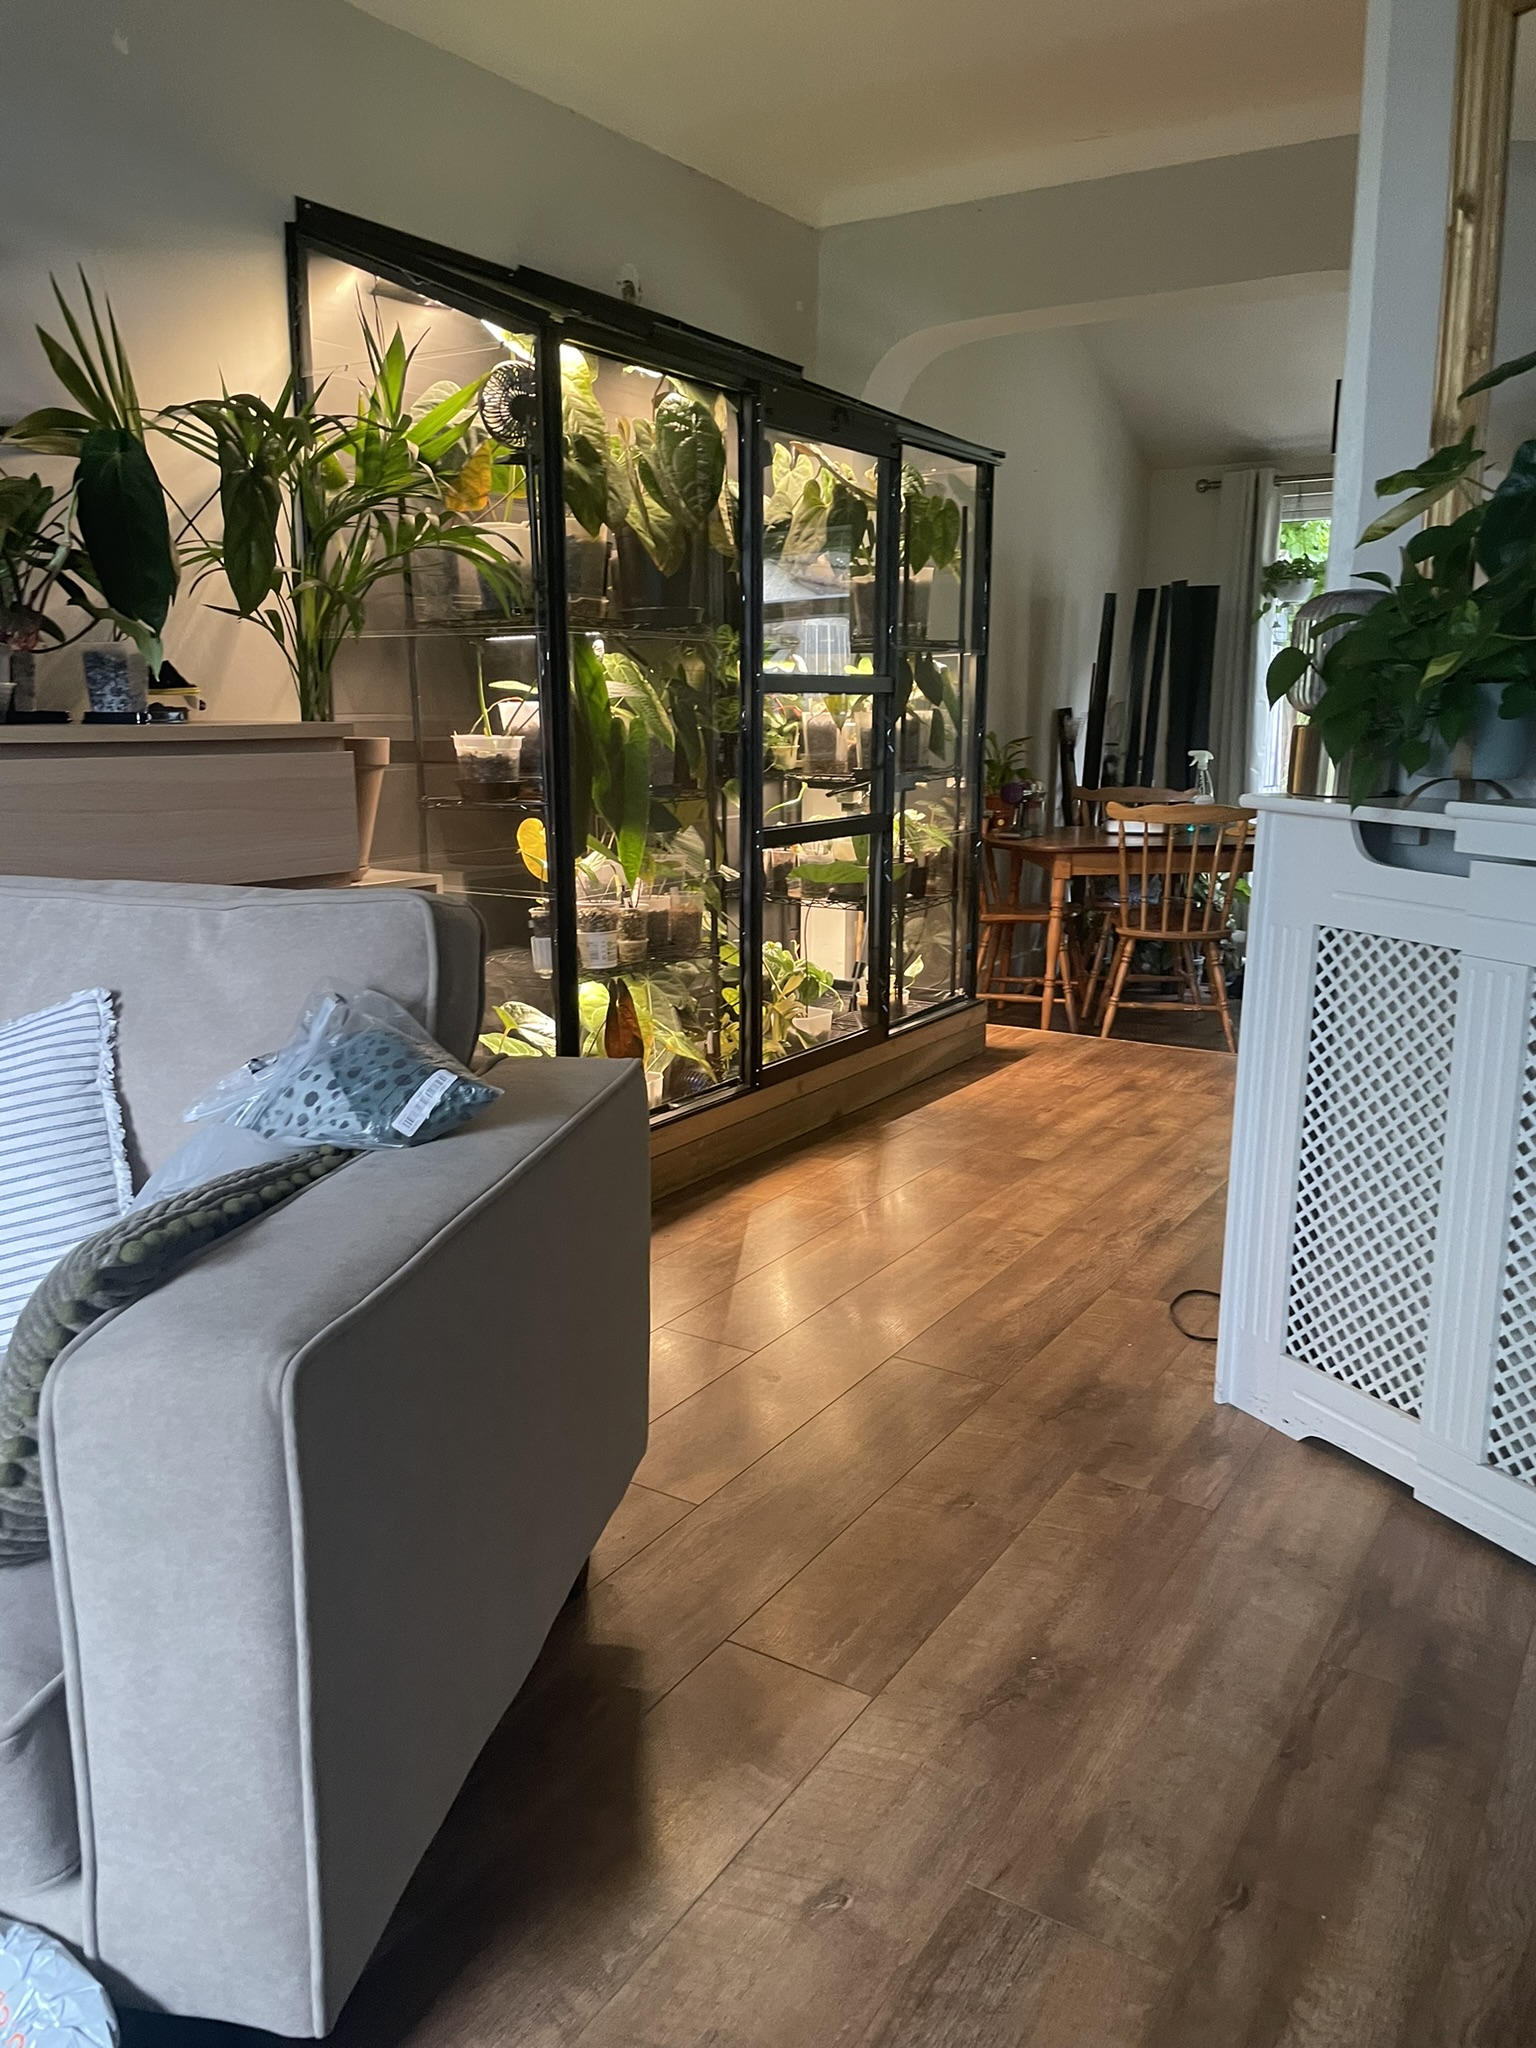
My wife is a big plant lover and has a little side hustle selling exotic plants. They require very specific temperature and humidity levels. She usually gets a cheap glass cabinet from Ikea, but this time she wanted something bigger. She sourced an indoor greenhouse and volunteered me as the builder. :)
The greenhouses are pretty straightforward to build, but we needed to make some adjustments since it had to be flush with the wall. Because of the skirting board, the whole greenhouse needed to be lifted by about four inches. Off we went to B&Q to get some wood, and after about 40 minutes of using the circular saw (I knew there was a good reason for buying it!), we had the base sorted.
The greenhouse has a metal frame with glass inserts, but the back is open because it's designed to be fixed to a wall. Due to the temperature and humidity requirements, we needed to seal the back wall before attaching the frame to it. Once again, B&Q came to the rescue with a thin corrugated plastic matting that's meant to be used as some kind of floor covering. It's waterproof and easy to attach to the wall. Once that was in place, we could start assembling the frame.
It only took a couple of hours to build the frame. The longest part was getting the glass in and securely fastened. We also had to find a glass cutter because of some of the adjustments we made, but once everything was complete, it looked like a professional had built it. We also needed power, lights, fans, and shelving, but that was up to my wife to sort out. My work was done. :)
The end result with all the lights, shelving and plants in place looks prety damn good and its something different in the house
I never thought I'd say this but we've filled it now and need a bigger one! Oh lord. :)
The whole project was surprisingly enjoyable, and it felt great to see everything come together so well, especially knowing it would provide the perfect environment for her beloved plants.
Another cool use for a Raspberry Pi is as a retro gaming emulator, so I've installed RetroPie. The official description on their site says: "RetroPie is a free, open-source software package that transforms devices like the Raspberry Pi into versatile retro gaming consoles. By integrating various emulation projects, RetroPie enables users to play classic games from a wide array of systems, including the NES, SNES, Sega Genesis, PlayStation 1, and many others."
I saw a cool case for the Raspberry Pi by a company called Argon 40, called the Argon One. It comes with a breakout board that sets up a power button and moves all the I/O connectors to the rear. It even includes a fan, essential for Pi 4s and above.
I have mine set up with a Pi 4, so it comfortably outputs to a 4K display. The case also comes with software to attach game controllers via Bluetooth. I have a spare PS4 controller, and it works really well.
The case is small enough to attach to the back of your TV if you want a clean look. However, I like the design and think it looks pretty nice sitting next to my PS5. Since it's so small, it looks unobtrusive and fits in with the surroundings and more importanly they wife doesnt mind it being there, as long as I keep it clean. :)
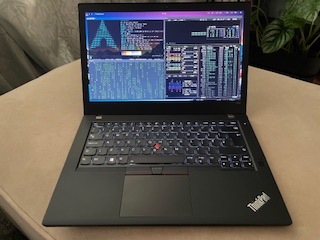
In the late 2000's, one of the companies I used to work for gave me a Lenovo T20 and that started my appriciation of these machines. Over 15 years later I now have a T480 running Arch Linux as my main laptop. I was a Apple stan up until the late 2010's', but with Apple pricing being what it is todays and laptops being powerfull enough to run Linux easily, it's a no brainer.
One of the great things about these laptops is their upgradeability. While the CPU/GPU are soldered on, pretty much everything else you can upgrade. On mine I have added extra RAM, a bigger SSD, changed the Wifi card so it supports 6E, also the keyboard, trackpad, display and I have bought a palm rest to replace the grubby one I have at the moment. That is a big job though and requires all the internals to be removed.
I'm pleased with how this laptop has turned out. It runs Linux like its a brand new machine (did I mention I run Arch BTW), has Thunderbolt and USB C, so should last me a while and if anything does go wrong spare parts are availabe from Lenovo or second hand ones via eBay.
Setting up a reliable and secure email server on a Vultr VPS involves several key components and configurations to ensure optimal functionality and security. Here's an overview of the process:
By combining these elements, your Vultr VPS email server is not only functional but also secure and aligned with best practices. Whether for personal or professional use, this setup provides a robust solution for managing email communications.
I've been wanting to add more security to my home network for a while and have played around with various setups and platforms and initially had a Raspberry Pi as a Wifi access point, but the throughput was low and the firewall features limited, so after a bit of digging came accros the open source firewall platforms pfSense and OPNsense. I played around with both of them on VMs and eventually settled on OPNsense as I prefered the UI.
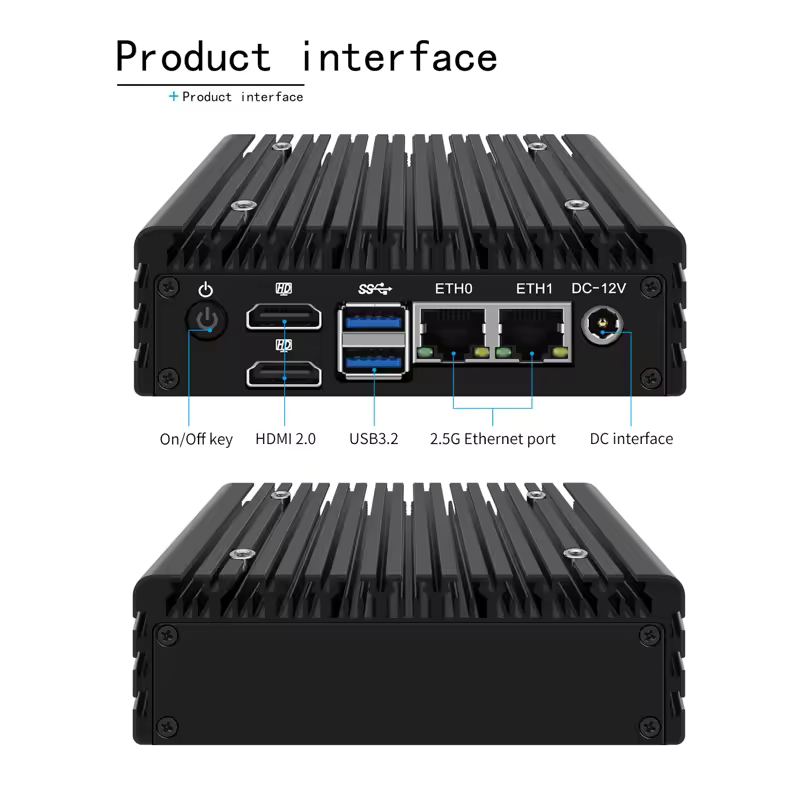
Next I needed hardware that had dual NICs and a decent CPU and found a cheap Mini PC on AliExpress for £66 (link below). This is basically a laptop quad core PC, which is more than enough horsepower for a home LAN firewall. For that price its what the site calls bare bones meaning no RAM or hard drive, but I had a speare 8GB SODIMM and a 125Gb HDD lying around which is more than enough for this project.
Setup is pretty easy, download the ISO from the OPNsense site, flash it to a USB stick, then boot the MiniPC from the USB stick and follow all the prompts. I was planning on adding this as a transparent firewall, but couldn't figre out how to do that with just 2 ports, so settled for a layer 3 firewall in the end, just adding a seperate subnet behind my ISPs router, which does mean I have double NAT going on, but it hasnt caused any issues and dont have a requirement for external access.
OPNsense has all your normal firewall features like rules, NAT, VPNs, etc plus as its open source there are loads of plugins and packages that you can install. I have AV setup (ClamAV) to scan all incoming packets, plus IDS and IPS. Theres even a plugin for NGFW features called Zenamour, which is free but has limited features, if you subcribe you get the full feature set.
It's a bit different from a normal vendor firewall like Checkpoint or Cisco ASAs, but once you get used to it, its relativly straight forward. You can even set it up as a cluster for redundancy, Not that I need that, but nice to have.
Its been up and running for over a year now and apart from the expected teathing issues at the begining I have had no issues with it. It sits there day in day out chugging away.
Link to the Mini PC